Color management is one of the most important aspects of inkjet printing. There are many variables that come into play when trying to accurately match colors. This Tech Tip will give a brief description of the elements of color management, followed by how to troubleshoot color matching issues on a case-by-case basis.
Download these instructions as a printable PDF file. (670k)
Elements of the Color Management Process
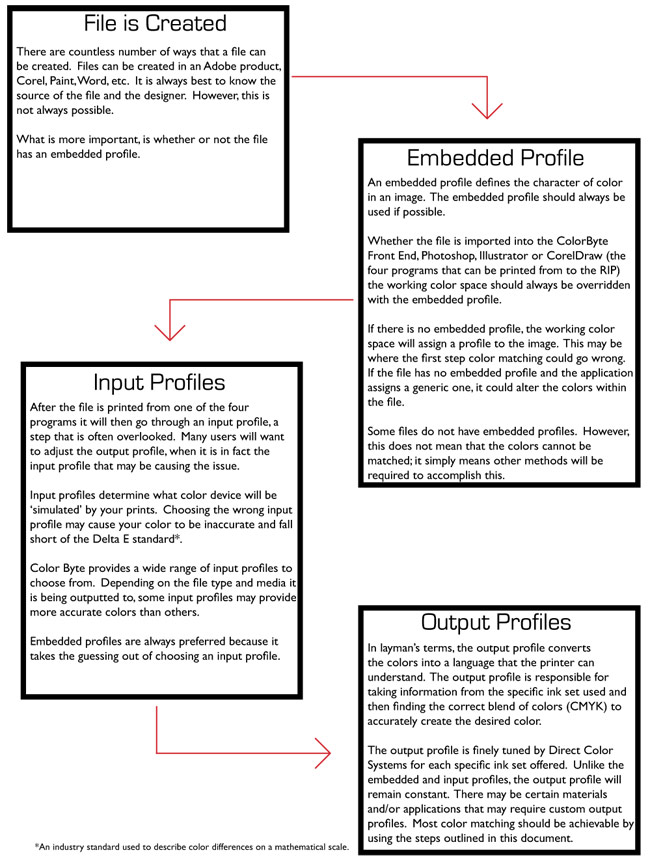
Color Management Flow Chart
Embedded Profiles
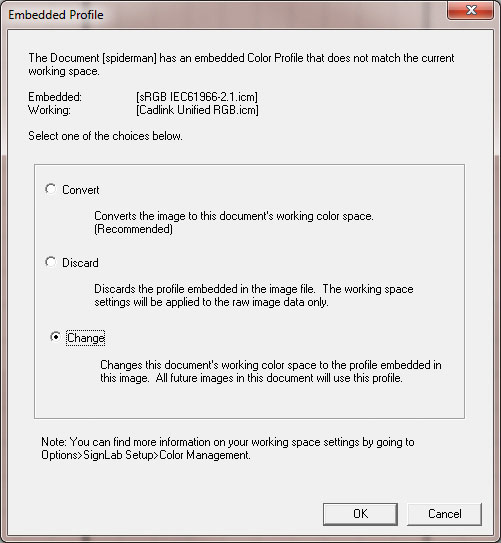
When a document has an embedded color profile and it is imported into the front end of ColorByte, this dialog screen will appear. This dialog box shows what the Embedded Profile is (sRRB IEC61966-2.1.icm). This also shows the Working Color Profile (Cadlink Unified RGB.icm). If there was no embedded profile with this image, this is the profile that would be used.
When presented with this screen, select "Change" in order to change the working space color profile to the one that is embedded in the file.
Be careful when multiple images are imported into one file. The working space cannot handle multiple embedded profiles at one time, and will keep the embedded profile that was first selected when the first image was imported.
Input Profiles
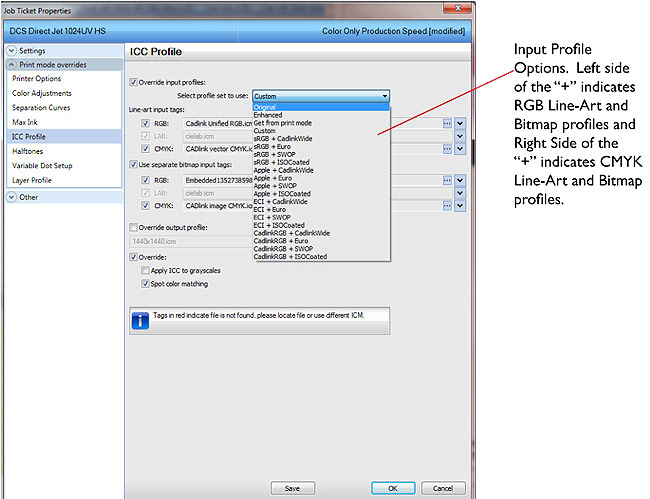
Once the file has been sent to the RIP, double-clicking the job will allow you to access the ICC Profiles tab and the Input Profiles.
This is where it becomes important to know what kind of file you are working with. The image that was imported into the front end of Color Byte was a Bitmap that was created in an RGB color space. Therefore, that is the only input profile to be concerned with. The embedded profile that imported into the RIP is outlined in blue below.
Note that the name of the embedded profile has changed. This is common.
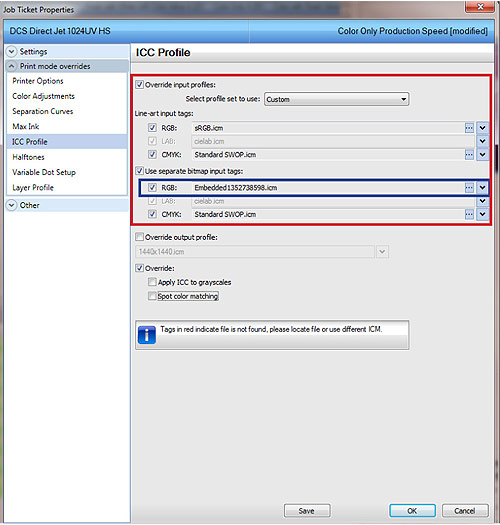
If there is no embedded profile with the image, the RIP will select a generic input profile. If this is the case, test different input profiles until the desired color is achieved. sRGB + Standard SWOP are the suggested generic input profiles for the RGB and CMYK line-art and bitmap images. Different input profiles can be selected by using the drop down "select profile set to use" menu.
Output Profiles
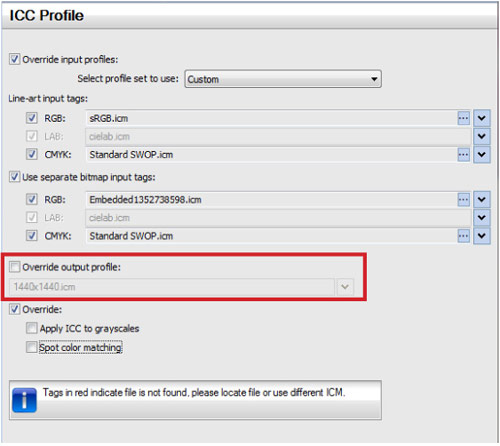
The output profile will only change based upon which resolution is chosen. The output profile will remain constant from job to job, as it works in tandem with the ink set that is used in the machine. It should only need to be altered for special applications. This is the final profile that the image goes through before it is sent to the printer.
Printer Proofing
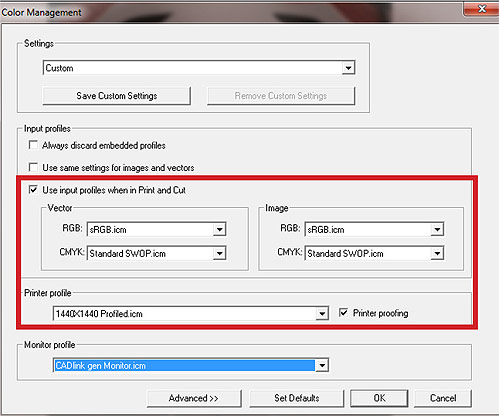
By turning on printer proofing and selecting a profile that was created by DCS, the software will attempt to show the colors on the screen the same way that they will look when printed.
Go to Options > ColorByte Setup > Color Management.
Check ON printer proofing and under the drop down menu choose browse.
Browse to the profile of the resolution you intend on printing the file in. Path is... C:\color byte RP9\color byte VPM\rip\system\clinks\DJ1024UV
Color Management Troubleshooting
The most important part of color matching is establishing a standard. The standard should be something tangible in order to match the printed output from the machine to an object. On-screen comparisons should be avoided at all costs as there are far too many variables at play and it is almost impossible to support. The real goal here is to remove opinion from the equation.
Once the standard is set you must determine if the file has an embedded profile. If there is no embedded profile then changing and testing the various input profiles is the most effective way to get the colors to match. The LAB input profiles can never be changed because those are set at a standard. The RGB and CMYK Line-Art and Bitmap profiles can be changed on a job to job basis.
Direct Color Systems has spent a great deal of time perfecting the output profile's provided in the software. We stand behind the fact that the output profiles provide the user with a wide gamut of colors. As is the case with any output profile, for any printer, some colors cannot be perfectly achieved.
